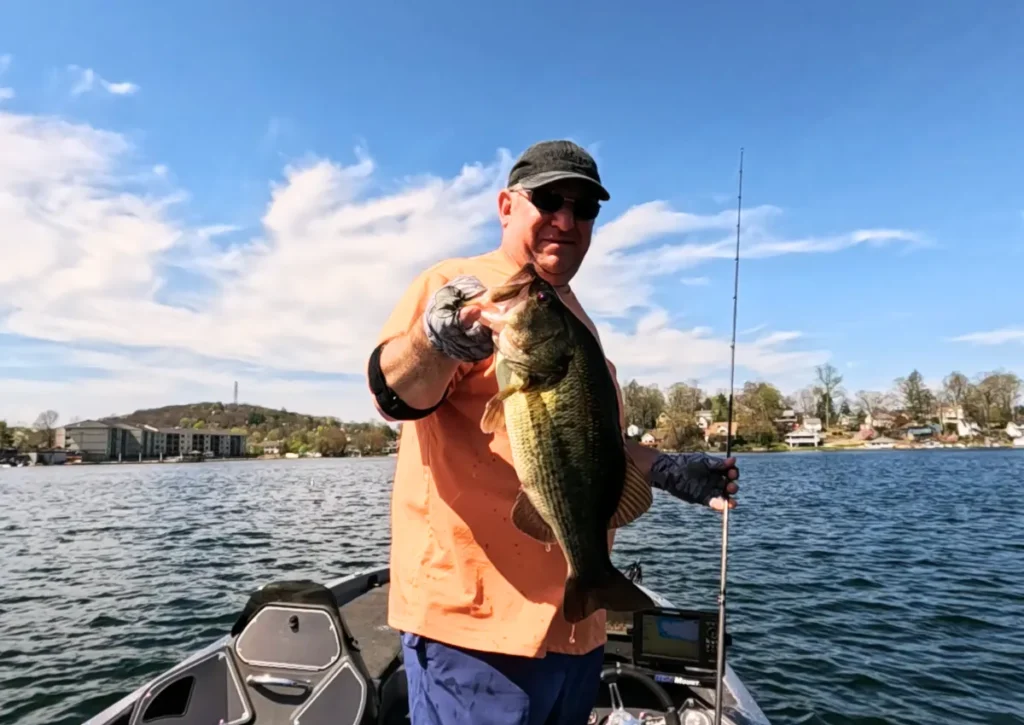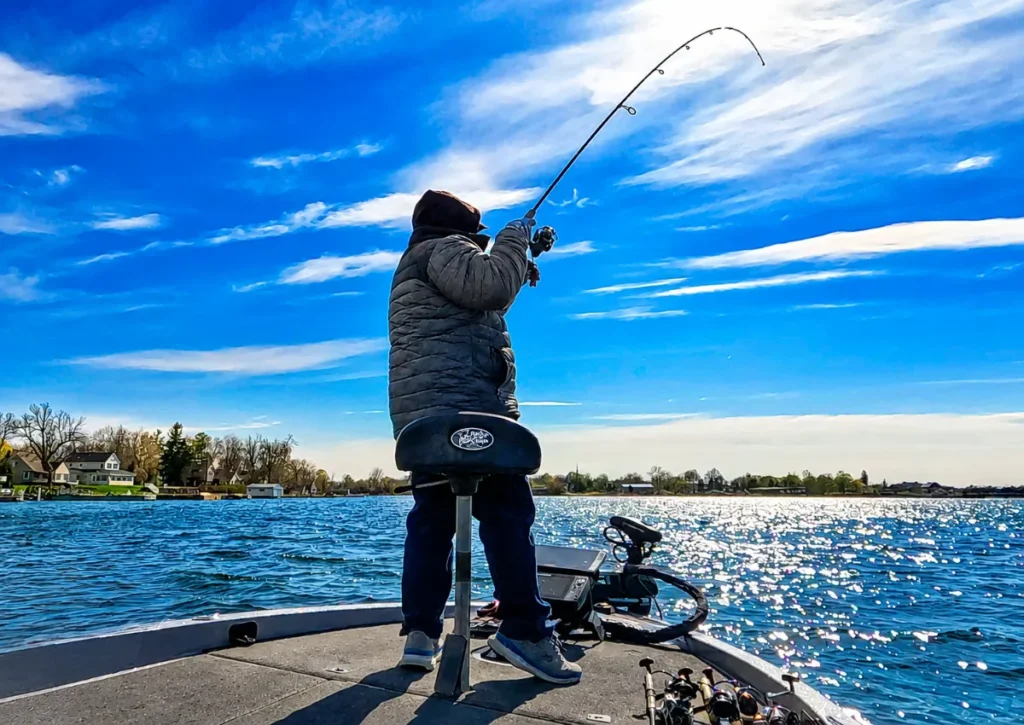
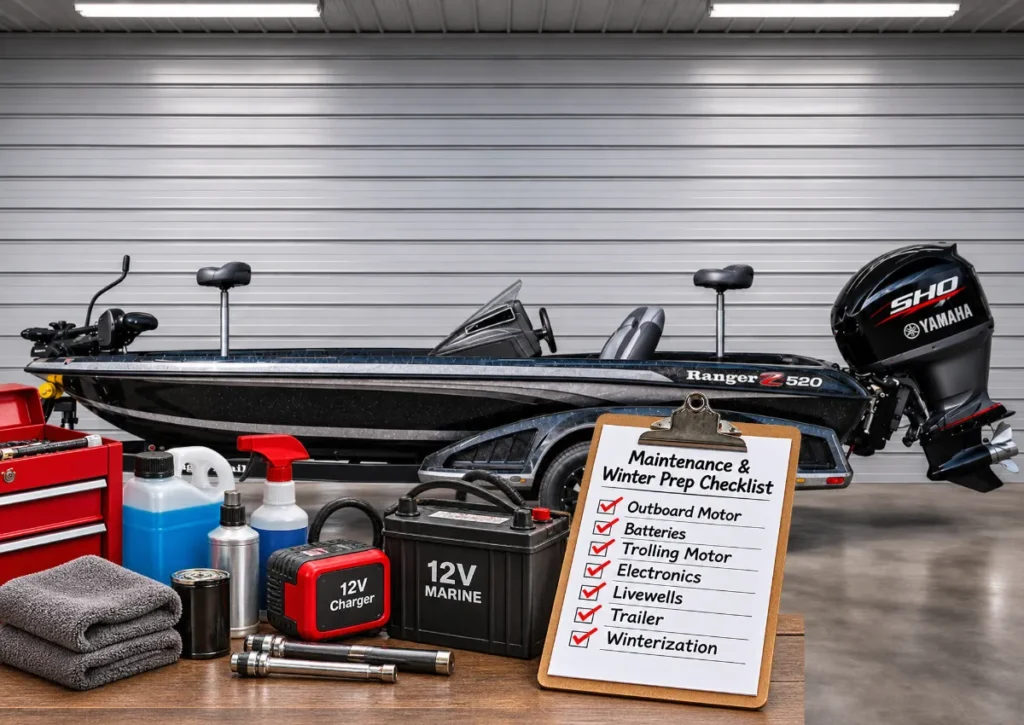
Your bass boat takes a beating throughout the fishing season. Long runs across rough water, shallow-water navigation, submerged stumps, changing weather conditions, and countless hours on the trolling motor all contribute to wear on your equipment.
Most anglers are pretty good about taking care of their fishing tackle. We replace worn fishing line, sharpen hooks, service reels, and make sure everything is ready for the next trip. But what about the boat itself?
A bass boat is a collection of mechanical, electrical, and plumbing systems that must work together. The outboard gets you across the lake, the trolling motor keeps you on fish, the electronics help you locate them, and the livewell keeps your catch healthy. Even the trailer plays an important role in getting you to and from the water safely.
When one of those systems fails, a great day of fishing can turn into a frustrating and sometimes expensive experience.
That's why preventative maintenance is so important.
Whether you're putting your boat away for the winter or continuing to fish throughout the colder months, taking the time to inspect and service your equipment can prevent problems before they develop.
This guide covers the important areas of bass boat maintenance, including outboards, batteries, trolling motors, electronics, livewells, bilge systems, trailers, and winter storage.
You don't have to tackle everything in one afternoon. Work through each section at your own pace, use the maintenance checklists, and address problems before they affect your next trip.
Looking for something specific? Select a topic below to jump directly to that section of the guide.
1. Why Bass Boat Maintenance Shouldn't Wait Until Spring
It's easy to put off boat maintenance when everything appears to be working properly. The motor starts, the trolling motor runs, and your electronics light up. Why worry about something that isn't broken?
The problem is that many mechanical and electrical failures don't happen without warning. They develop gradually, often over an entire fishing season.
A little fishing line wrapped around a propeller shaft can eventually damage a seal. A loose battery connection can become an intermittent electrical problem. Water entering a trailer hub can gradually destroy a bearing. And a livewell pump that occasionally struggles to move water may be close to failing completely.
None of these problems necessarily prevents you from fishing today. But ignoring them can lead to trouble tomorrow.
The end of the fishing season is an excellent opportunity to give your boat some attention, particularly if you live in an area where freezing temperatures will keep you off the water for several months.
Cold weather introduces additional concerns. Water trapped inside plumbing, pump housings, and certain engine components can freeze and expand. Batteries require proper storage, moisture can collect in compartments, and exposed metal components can develop corrosion.
Even anglers who fish year-round should periodically perform a thorough maintenance inspection.
The goal isn't simply to winterize your boat. It's to keep it dependable, protect your investment, and minimize the time you spend dealing with repairs instead of fishing.
2. Start With a Complete Bass Boat Inspection
Before servicing individual components, give the entire boat a thorough inspection.
Start by removing tackle and unnecessary gear from your compartments. Wash the boat, remove accumulated dirt, and allow everything to dry. A clean boat makes it much easier to identify damaged areas, leaks, corrosion, and loose hardware.
Check the Hull and Transom
Walk around the boat and carefully inspect the hull, including the keel, chines, and areas that frequently contact the trailer bunks.
Look for deep scratches, cracks, gouges, damaged gelcoat, or evidence of impact with rocks and submerged objects.
Pay particular attention to the transom, where the outboard and jack plate, if equipped, are mounted.
Inspect accessible mounting hardware and the surrounding surfaces for unusual movement, cracking, separation, or signs of water intrusion.
A minor cosmetic scratch is very different from a structural crack. If you discover damage around the transom, mounting points, or other structural areas, have it evaluated before operating the boat.
Inspect Steering, Controls and Hardware
Check the steering wheel and related components for unusual resistance, excessive play, or inconsistent movement.
Hydraulic steering systems should be inspected for fluid leaks, damaged hoses, and loose connections. Mechanical steering systems require attention to cable condition and proper operation.
Inspect throttle and shift controls for smooth movement, unusual stiffness, or damaged cables.
Check compartment lids, hinges, latches, cleats, seat bases, and other hardware. Rough water and repeated use can gradually loosen fasteners.
Look for Water Where It Doesn't Belong
Open every compartment and inspect for dampness, standing water, unusual odors, or evidence of mildew.
Water beneath storage compartments, around battery trays, or in otherwise dry areas may indicate leaking seals, damaged fittings, or clogged drainage passages.
A small amount of water in the bilge after a rainy trip may be expected, but recurring unexplained water accumulation deserves investigation.
Review Your Maintenance History
Before moving on, check the number of engine hours accumulated since the last service.
Review any maintenance records you have and make a list of the problems you've noticed throughout the season, including issues that seemed to correct themselves.
An intermittent problem is still a problem.
Boat Inspection Checklist
☐ Wash and thoroughly dry the boat.
☐ Inspect the hull, keel, and transom for damage.
☐ Check accessible motor and jack plate mounting hardware.
☐ Inspect steering and control systems.
☐ Examine compartments for moisture and leaks.
☐ Check hinges, latches, seat bases, and other hardware.
☐ Record engine hours and review service history.
☐ Make a list of repairs and maintenance items that need attention.
3. Outboard Motor Maintenance: Protecting Your Biggest Investment
For most bass boat owners, the outboard motor represents one of the most expensive pieces of equipment on the boat.
Routine maintenance protects that investment and helps ensure your engine performs properly when you need it.
Whether you run a Mercury, Yamaha, Honda, or another outboard, the basic areas requiring attention are similar. However, the actual service procedures, lubricant specifications, replacement intervals, and winterization requirements vary by engine and model.
Your owner's manual should always be the starting point.
Engine Oil and Filter
If you have a four-stroke outboard, changing the engine oil and filter is an important part of routine maintenance.
Over time, engine oil can accumulate combustion byproducts, moisture, and other contaminants. Allowing contaminated oil to remain in the engine throughout an extended storage period is generally undesirable.
Many manufacturers recommend servicing engine oil based on operating hours or elapsed time, whichever comes first. Always verify the actual interval for your engine.
Use the specified marine engine oil, filter, and replacement seals. Do not assume that an automotive oil with a similar viscosity automatically meets your outboard's requirements.
Two-stroke engines have different lubrication systems. Conventional and direct-injected two-strokes do not use the same crankcase oil-change procedure as four-strokes.
They may require inspection of their oil delivery systems, reservoirs, and associated components instead.
What to look for: Unexplained changes in oil level, unusual oil appearance, visible leaks, damaged filters, or missed maintenance intervals.
Lower-Unit Gear Lubricant
One of the most important maintenance jobs before winter storage is inspecting and servicing the lower-unit gear lubricant.
The gearcase contains gears, bearings, and other components operating under significant loads.
Water entering the lower unit through a damaged seal can contaminate the lubricant and cause internal damage. In freezing weather, trapped water can also expand and damage the gearcase.
When old gear lubricant is drained, examine its condition.
Gear oil that appears milky or creamy can indicate water contamination. A small amount of fine metallic residue on a magnetic drain plug may be normal in some circumstances, but unusual metal particles or larger fragments require further investigation.
If water contamination is suspected, simply replacing the lubricant does not correct the underlying problem. The gearcase should be inspected and pressure-tested by a qualified technician.
Use the lubricant and filling procedure specified for your engine, and replace required drain-plug seals.
What to look for: Milky lubricant, metal fragments, unexplained lubricant loss, leaking seals, or visible damage to the lower-unit housing.
Propeller and Prop Shaft Inspection
Your outboard propeller deserves more attention than a quick glance at the blades.
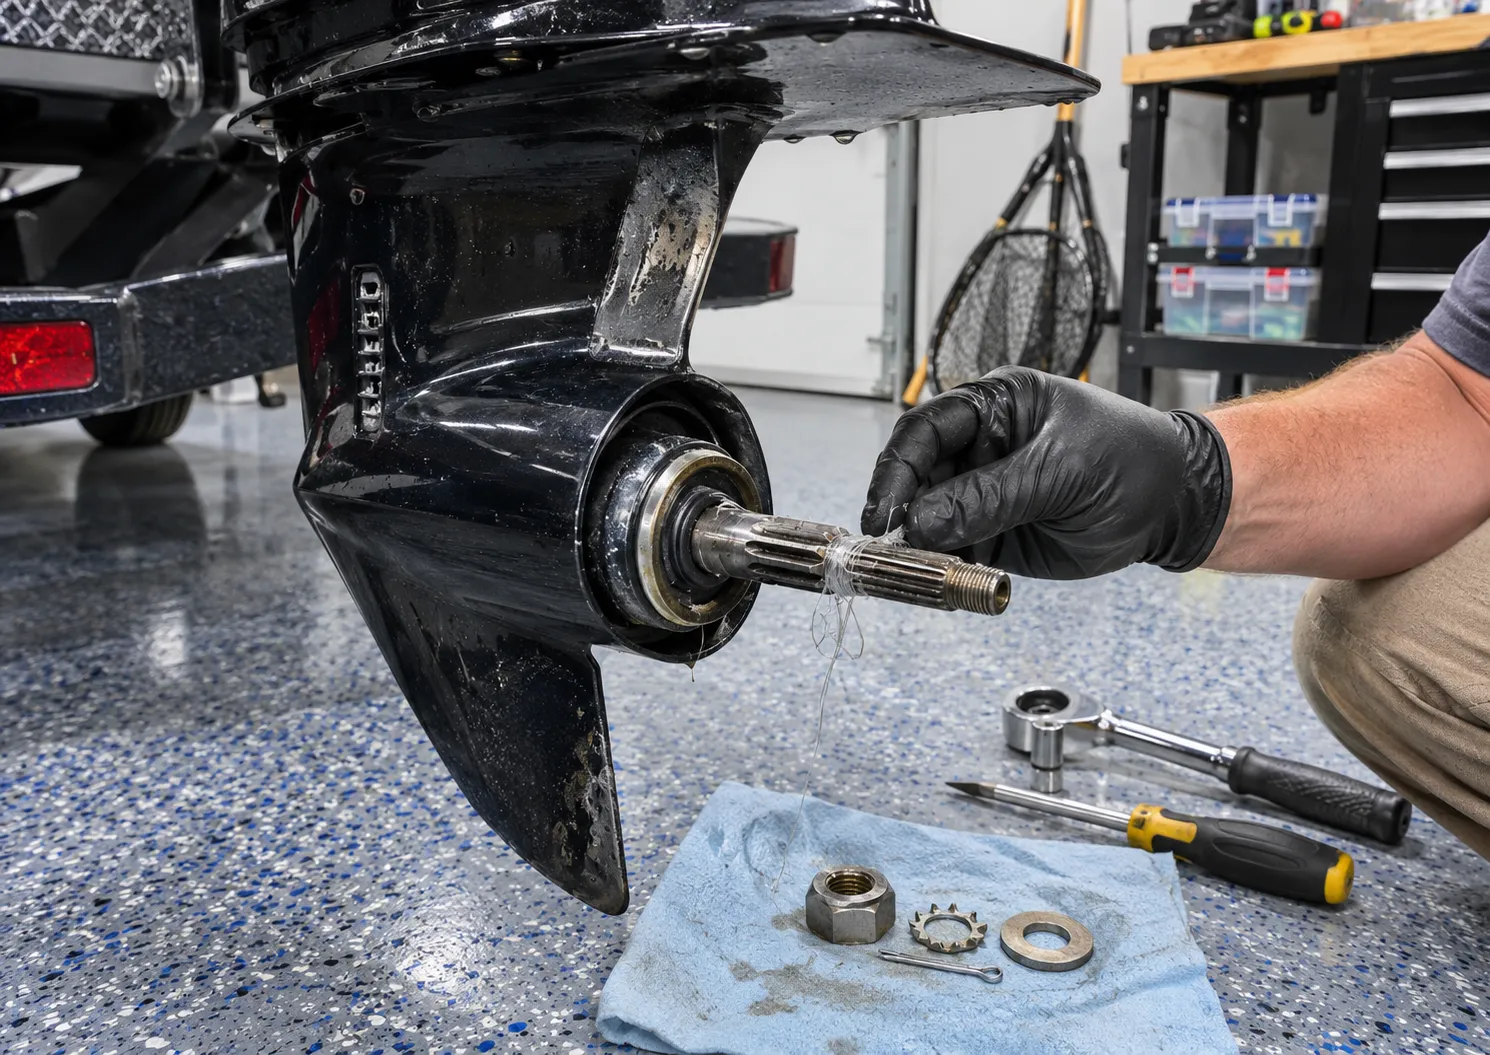
Fishing line can become wrapped around the prop shaft, sometimes hidden beneath accumulated grease.
Left in place, that line can work its way toward the prop-shaft seal, potentially damaging it and allowing water into the gearcase.
With the engine off and properly secured against accidental starting, remove the propeller according to the manufacturer's instructions.
Inspect the shaft carefully for fishing line, weeds, or other debris. Remove material without scratching or damaging the shaft or surrounding seals.
Check the propeller for bent blades, cracks, chipped edges, and other damage.
Even relatively minor prop damage can create vibration and reduce efficiency. More serious damage may require professional repair or replacement.
Before reinstalling the propeller, apply the specified marine lubricant where required and tighten all hardware to the manufacturer's specifications. Do not guess at propeller nut torque or omit required retaining hardware.
What to look for: Fishing line behind the prop, damaged blades, unusual vibration, damaged seals, or a bent prop shaft.
Cooling System and Water Pump
An outboard depends on a properly functioning cooling system to maintain safe operating temperatures.
Inspect water intake openings for weeds, mud, sand, and other debris.
Pay attention to cooling-water discharge behavior during normal operation, but remember that the visible telltale stream is not a complete measure of cooling-system health on every engine.
A weak or inconsistent stream can indicate a restriction or other issue, but a normal-looking stream does not guarantee that every cooling passage is clear.
The water pump impeller is another important service item. Rubber impellers deteriorate with age, usage, and environmental conditions.
Follow your manufacturer's recommended inspection and replacement interval rather than waiting for an overheating alarm.
When flushing an outboard, use the correct procedure and approved flushing connections for your engine. Never operate an engine without the required cooling-water supply.
What to look for: Overheating warnings, reduced cooling-water flow, clogged intakes, damaged hoses, or overdue impeller service.
Fuel System Inspection and Maintenance
Modern outboards have fuel systems that require clean, properly stored fuel.
Fuel deteriorates during extended storage, and moisture or contamination can lead to starting and performance problems.
Inspect accessible fuel lines and connections for cracking, abrasion, deterioration, or leakage.
Check the condition of the primer bulb if your boat uses one, and review fuel-filter and water-separator replacement requirements.
If the boat will be stored for an extended period, use a fuel treatment approved for your particular engine and fuel system.
Follow the manufacturer's recommended fuel quantity and storage procedure. Recommendations can differ depending on the fuel tank design, fuel type, and engine.
If your engine requires stabilized fuel to circulate through its fuel system before storage, follow the approved procedure for doing so.
Fuel stabilizer helps protect suitable fresh fuel during storage, but it cannot restore severely deteriorated or contaminated gasoline.
What to look for: Fuel odors, visible leaks, deteriorating hoses, water in filters, hard starting, or poor running that may indicate fuel-system problems.
Steering, Trim and Corrosion Protection
Inspect power trim and tilt systems for smooth operation, visible leaks, and damaged hydraulic components.
Check fluid levels only according to the manufacturer's procedure. Some systems require the motor to be positioned and supported in a particular way.
Inspect sacrificial anodes for deterioration, and replace them according to the manufacturer's limits.
Anodes help protect submerged metal components from galvanic corrosion. They should never be painted over.
Lubricate specified steering, pivot, and other service points using the correct marine grease.
Inspect the engine exterior for damaged paint, exposed metal, and corrosion. Address small areas before they become worse.
Outboard Maintenance Checklist
☐ Review engine hours and manufacturer service intervals.
☐ Change four-stroke engine oil and filter when due.
☐ Inspect or replace lower-unit gear lubricant.
☐ Investigate any signs of water contamination.
☐ Remove and inspect the propeller.
☐ Check for fishing line around the prop shaft.
☐ Inspect water intakes and cooling-system components.
☐ Review water pump and impeller service history.
☐ Inspect fuel lines, filters, and connections.
☐ Check steering and power trim systems.
☐ Inspect sacrificial anodes and corrosion-prone areas.
☐ Lubricate designated service points.
☐ Complete manufacturer-specific storage procedures if applicable.
When to seek professional service: Suspected gearcase leaks, overheating, damaged prop shafts, steering problems, fuel leaks, abnormal engine operation, or work requiring special tools and diagnostics.
For additional outboard winterization resources, see BASSIN' USA's How To Winterize Your Outboard [VIDEO].
4. Battery Maintenance: Cranking, Trolling Motor and Lithium Systems
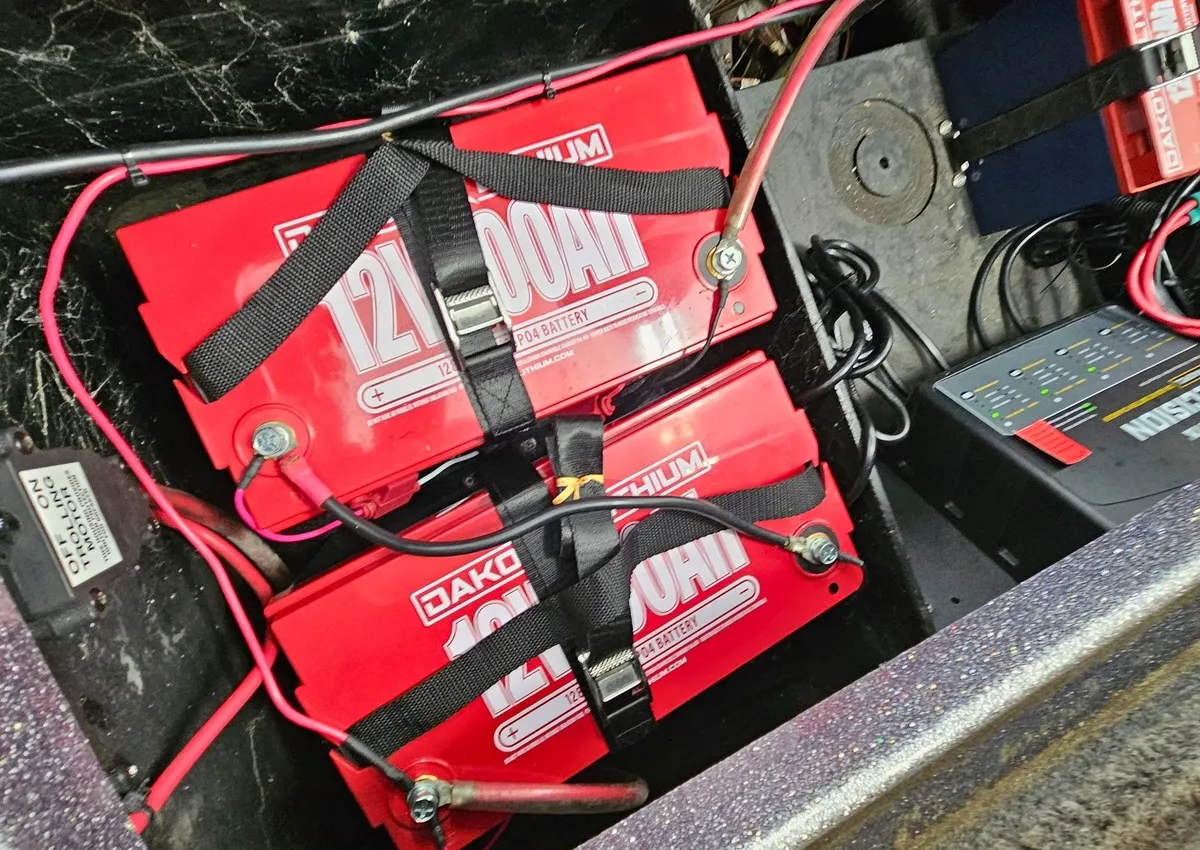
A modern bass boat may have several batteries powering different equipment.
Your starting battery supports the outboard and, depending on the boat's design, other onboard systems. Trolling motor batteries supply the sustained power needed to fish throughout the day.
Some boats also use dedicated electronics batteries.
Keeping these batteries in good condition is especially important because battery failures can affect multiple systems simultaneously.
Know Which Batteries You Have
Before performing maintenance, identify the type of battery installed in each system.
Common types include:
- Flooded lead-acid batteries
- AGM batteries
- Lithium iron phosphate (LiFePO4) batteries
These batteries have different charging and storage requirements.
Never assume that a maintenance procedure suitable for one battery type is appropriate for another.
Inspect Terminals, Cables and Connections
Start with the boat's electrical power switched off and follow the battery manufacturer's instructions for safely disconnecting connections if necessary.
Inspect battery terminals for corrosion, looseness, damaged cable ends, and signs of overheating.
White or greenish deposits around connections can indicate corrosion. Discolored or melted terminal covers can suggest excessive resistance or overheating.
Clean connections using an appropriate procedure for the battery type, and ensure all connections are tightened to the required specifications.
Inspect cable insulation for rubbing, cracking, and damage.
Also check battery trays and hold-downs. Batteries must remain securely mounted when the boat encounters rough water.
A loose battery can damage wiring, shift unexpectedly, or create a serious electrical hazard.
Flooded Lead-Acid and AGM Battery Storage
Traditional lead-acid batteries should generally be stored in a properly charged condition.
Allowing them to remain discharged for extended periods can cause sulfation and permanently reduce capacity.
Flooded lead-acid batteries may require inspection of electrolyte levels, depending on their construction. Follow manufacturer instructions and use only the specified water when servicing batteries designed to be maintained.
Sealed AGM batteries should not be opened.
A compatible automatic maintenance charger can help maintain appropriate charge levels during storage, provided the battery manufacturer permits continuous connection.
Avoid using an incompatible charger or one that can overcharge the battery.
Lithium Battery Maintenance and Winter Storage
Lithium batteries require particular attention during cold weather.
Many modern bass boats use LiFePO4 batteries for trolling motors because of their weight, usable capacity, and performance advantages.
However, charging lithium batteries at temperatures below their permitted charging range can cause permanent damage.
Some batteries contain battery management systems that prevent charging under unsafe conditions. Others offer internal heating systems that allow charging after the battery reaches an acceptable temperature.
Those features vary between manufacturers and models.
For storage, lithium batteries may require a particular state of charge rather than being kept continuously at 100 percent.
Some manufacturers recommend partial-charge storage for extended periods, while others specify different preparation procedures.
Follow the instructions for your exact battery model rather than relying on generalized lithium battery advice.
A charger designed for lead-acid batteries may not be compatible with lithium batteries, even if the nominal voltage appears similar.
Check Battery Performance
Pay attention to batteries that suddenly provide less runtime than expected.
A trolling motor battery that consistently loses charge much faster than before may be aging or experiencing another problem.
Slow engine cranking, repeated low-voltage warnings, or electronics restarting when other equipment operates may also indicate battery or connection problems.
Voltage readings alone do not always provide an accurate picture of battery health, particularly with lithium systems.
Where appropriate, use manufacturer-approved testing methods or have the batteries professionally evaluated.
Battery Maintenance Checklist
☐ Identify the type and purpose of each battery.
☐ Inspect battery terminals and cable connections.
☐ Check for corrosion, overheating, or damaged insulation.
☐ Inspect battery trays and hold-downs.
☐ Confirm charger compatibility with each battery.
☐ Check battery health and charging performance.
☐ Follow the correct storage charge recommendations.
☐ Protect batteries from temperatures outside their approved range.
☐ Verify lithium low-temperature charging protection where applicable.
☐ Monitor batteries during extended storage as directed.
What to look for: Corroded terminals, unexplained voltage drops, reduced capacity, charger faults, swollen or damaged battery cases, or cables that become unusually warm.
Never charge a visibly damaged battery. Stop using it and seek guidance from the manufacturer or a qualified technician.
5. Trolling Motor Maintenance and Inspection
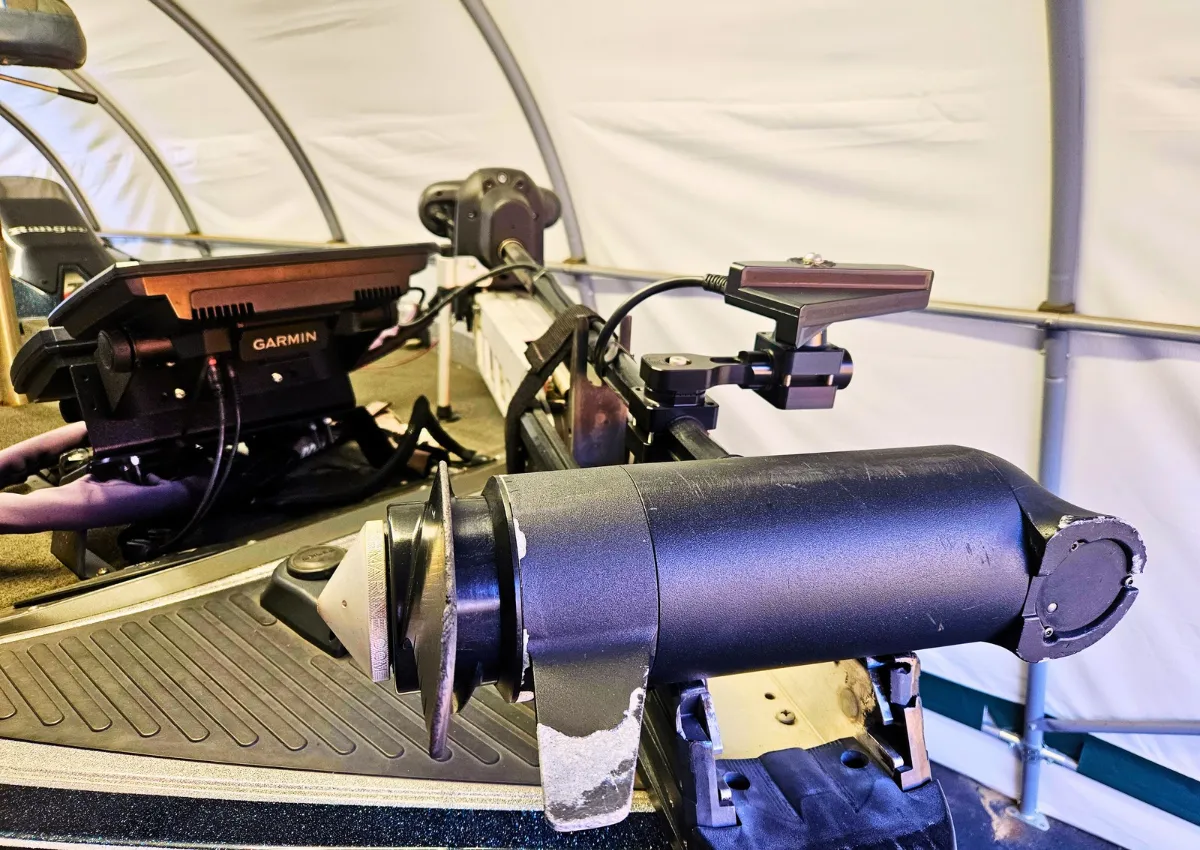
For bass anglers, the trolling motor may be one of the hardest-working pieces of equipment on the boat.
Whether you're working down a shoreline, holding over offshore structure, or fishing around submerged vegetation, it gets used constantly.
That makes it an important part of any maintenance routine.
Inspect the Trolling Motor Propeller
Like the outboard propeller, the trolling motor prop can collect fishing line, weeds, and other debris.
Fishing line wrapped around the motor shaft can damage seals if ignored.
Before working on the propeller, disconnect trolling motor power according to the manufacturer's instructions. Turning off the foot pedal or remote alone is not a substitute for proper electrical isolation.
Remove the propeller as directed and inspect the shaft for fishing line and accumulated material.
Check the propeller blades for cracks, chips, or other damage.
Inspect the drive pin and associated hardware where applicable.
Replace damaged components and reinstall the propeller according to the manufacturer's instructions.
Check the Mount and Deployment System
Trolling motors experience considerable vibration, particularly when boats are operated across rough water.
Inspect the mounting bracket and hardware for looseness or damage.
Check the stow-and-deploy mechanism for smooth operation.
Depending on your trolling motor model, this may include cables, springs, pivot points, bushings, locking mechanisms, and other moving parts.
Inspect the shaft for visible cracks, bends, or damage.
Do not apply lubricants indiscriminately. Some components require specific products, while others are designed to operate without lubrication.
Inspect Electrical Connections and Controls
Check the trolling motor's power cables, plug, receptacle, and accessible wiring.
Look for loose connections, discoloration, damaged insulation, or evidence of overheating.
Inspect foot pedals, steering cables, and electrical controls as applicable to your model.
If your trolling motor includes GPS anchoring, heading sensors, automatic boat positioning, or electronic steering, verify that those functions operate properly.
Review available software updates through the manufacturer when appropriate.
If performance has changed, check for low battery voltage, damaged connections, or mechanical interference before assuming the motor itself has failed.
Trolling Motor Maintenance Checklist
☐ Disconnect power before servicing.
☐ Remove and inspect the propeller.
☐ Clear fishing line, weeds, and debris.
☐ Inspect the shaft and drive pin where applicable.
☐ Check mounting bolts and brackets.
☐ Inspect stow-and-deploy mechanisms.
☐ Examine power cables and connectors.
☐ Test steering and controls.
☐ Verify GPS and positioning functions if equipped.
☐ Clean and dry the motor before storage.
What to look for: Unusual vibration, increased noise, reduced thrust, intermittent operation, loose mounts, damaged wiring, or problems deploying and stowing the motor.
6. Electronics, Wiring and Power Distribution
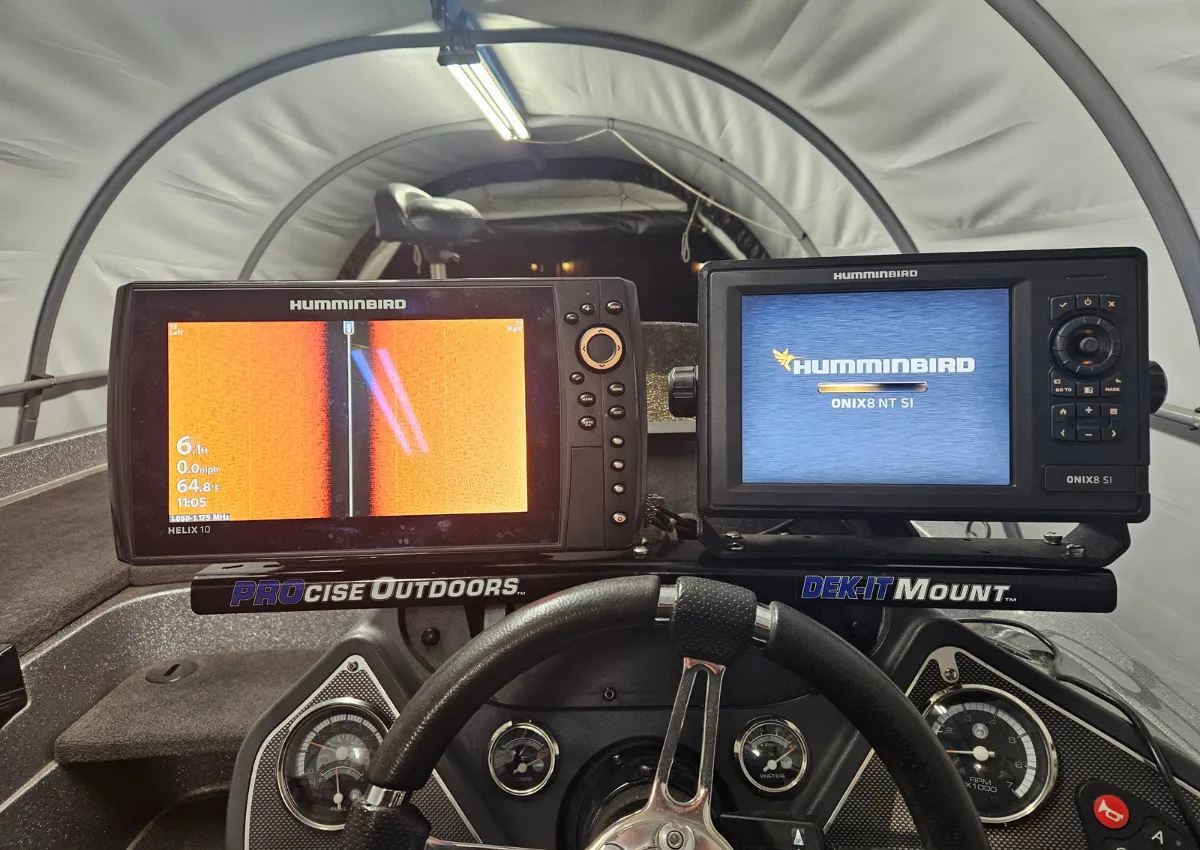
Today's bass boats often have sophisticated electronics systems.
Multiple sonar displays, GPS navigation, live sonar, networking equipment, shallow-water anchors, and various accessories place greater demands on the boat's electrical system.
While much of this equipment is designed for marine use, it still requires periodic inspection and care.
Clean and Inspect Fish Finders
Begin by cleaning your fish finder and chartplotter displays using products and materials approved by the manufacturer.
Avoid household glass cleaners or abrasive materials unless specifically permitted.
Inspect screen mounts and brackets for loose hardware or cracks.
Check accessible power and communication connections for moisture, corrosion, bent pins, or damaged locking mechanisms.
A connector that appears secure may still develop problems if exposed to repeated vibration or water intrusion.
Back Up Waypoints and Settings
Before performing software updates or changing equipment, consider backing up saved waypoints, routes, and other user data.
For anglers who have spent years building a collection of productive fishing locations, losing that information can be frustrating.
Some electronics manufacturers offer ways to export data to memory cards or compatible software.
Follow your specific unit's instructions, since backup procedures and supported formats vary.
Inspect Transducers and Networking Equipment
Inspect transducer mounts for cracks, loose bolts, and damage.
Check the transducer itself for impact damage or unusual wear.
Follow cables from the transducer toward the electronics wherever they are accessible, looking for abrasion, pinching, or sharp bends.
Pay particular attention to trolling motor-mounted transducers and forward-facing sonar installations, where cables may be exposed to repeated movement.
Inspect network connections and accessory power supplies as well.
Check Wiring and Power Distribution
A common source of electronics problems is not necessarily the electronic unit itself, but the system providing power to it.
Inspect accessible wiring, fuse holders, circuit breakers, and power distribution components.
Look for loose connections, corrosion, poorly secured wiring, or cables rubbing against sharp edges.
Check that wiring is properly supported and protected from damage.
If electronics restart when the outboard is cranked or other equipment activates, investigate battery condition, voltage drop, and wiring integrity.
Avoid bypassing protective devices or installing larger fuses to correct an electrical problem. Fuses and breakers must be properly matched to the circuit and equipment.
Off-Season Electronics Storage
If your electronics have removable displays, consider storing them in a clean, dry, secure location during extended periods of inactivity.
Use protective covers where appropriate and protect exposed connectors according to manufacturer recommendations.
Avoid trapping moisture inside tightly sealed coverings.
Electronics Maintenance Checklist
☐ Clean displays using approved materials.
☐ Inspect brackets and mounting hardware.
☐ Examine power and network connectors.
☐ Back up important waypoints and data.
☐ Review software updates.
☐ Inspect transducer mounts and cables.
☐ Check accessible fuses, breakers, and wiring.
☐ Investigate voltage-related performance issues.
☐ Protect or remove electronics for winter storage.
What to look for: Screens restarting unexpectedly, intermittent sonar, loose connectors, corroded terminals, damaged transducer cables, or unexplained electrical faults.
7. Livewell, Bilge and Plumbing System Maintenance
Livewell and bilge systems are easy to forget because most of their components are hidden inside compartments or beneath the rear deck.
But few things can create problems faster than discovering that a livewell pump has failed during a tournament or that your bilge pump isn't working when water begins collecting inside the boat.
These systems deserve regular inspection.
Clean and Inspect Your Livewells
Remove loose debris, old soft plastics, fishing line, dirt, and other material from the livewell compartments.
Clean the interior using products suitable for your boat's surfaces and rinse thoroughly.
Avoid leaving cleaning chemical residue that could harm fish during future use.
Inspect screens, drains, overflow openings, and fittings.
Examine the lid, hinges, and seals. Damaged seals may allow water to splash or leak into surrounding areas.
Test Aerator and Recirculation Pumps
Many bass boats have several pumps serving different functions, including filling, recirculating, and draining livewells.
Operate each function according to the manufacturer's instructions.
When water is available as required, verify actual water movement rather than relying solely on the sound of a running pump.
A pump motor may run while debris restricts the impeller or plumbing.
If a pump is weak or fails to move water, inspect accessible screens, intakes, and serviceable pump cartridges.
Do not assume all pumps can safely be operated without water.
Some pump designs can be damaged by dry running, so follow manufacturer testing instructions.
Inspect the Bilge Pump
The bilge pump is especially important because it removes water that collects inside the boat.
Open the bilge compartment and remove accumulated debris.
Soft plastic bait fragments, fishing line, leaves, and small objects can interfere with pump operation.
Inspect the pump intake and accessible components for blockages.
Test the manual switch and automatic operation, if equipped, using an appropriate manufacturer-approved procedure.
Confirm that water is discharged through the outlet and inspect the hose for restrictions or damage.
A working motor does not necessarily mean a properly working pump.
Check Plumbing and Fittings
Inspect hoses for cracks, abrasion, loose clamps, and deterioration.
Examine livewell valves, drain fittings, overflow hoses, and accessible through-hull connections.
A small leak that is easy to overlook during the season may become a larger problem later.
If you discover damaged plumbing or a leaking through-hull connection, correct the problem before returning the boat to service.
Protect Plumbing From Freezing
Water left inside livewell hoses, pumps, valves, and other plumbing components can freeze during winter storage.
Drain these systems using the boat manufacturer's recommended procedures.
Because plumbing layouts differ, simply opening the livewell drain may not remove all water trapped inside the system.
Some boats require additional drainage or winterization procedures for particular components.
Use only manufacturer-approved methods and winterizing products where required. Do not assume that running pumps briefly will completely empty every line.
Livewell, Bilge and Plumbing Checklist
☐ Clean livewell compartments and screens.
☐ Inspect livewell lids, seals, and drains.
☐ Test fill, aeration, and recirculation systems.
☐ Inspect accessible pump cartridges and intakes.
☐ Remove debris from the bilge compartment.
☐ Test manual and automatic bilge pump operation.
☐ Confirm proper water discharge.
☐ Inspect hoses, clamps, valves, and fittings.
☐ Investigate leaks or unusual water accumulation.
☐ Drain and winterize plumbing as required.
What to look for: Weak water flow, pumps that run without moving water, repeated blown fuses, unusual pump noises, loose hose connections, standing water, or moisture around fittings.
8. Hull, Deck, Compartments and Interior Maintenance
Maintaining the appearance of your bass boat is important, but cleaning also provides an opportunity to identify damage that might otherwise go unnoticed.
A thorough end-of-season cleaning helps protect the boat's surfaces and reduces problems caused by dirt and trapped moisture.
Hull and Gelcoat Care
Wash the hull using cleaning products suitable for fiberglass, gelcoat, painted aluminum, or the particular materials used in your boat.
Inspect high-wear areas, including the keel, chines, and lower hull.
Small surface scratches are common, especially on boats frequently operated in shallow water.
However, deep gouges, cracks, or exposed underlying materials deserve closer inspection.
Gelcoat protection products may help maintain appearance and reduce environmental wear when used correctly.
Carpet, Flooring and Upholstery
Fishing boat carpet can hold sand, mud, moisture, and fish residue.
Vacuum the carpet thoroughly and clean it according to the manufacturer's recommendations.
Allow everything to dry completely before covering the boat.
If your bass boat has synthetic deck flooring or other specialized surfaces, use the cleaning products recommended for those materials.
Inspect seat upholstery for cracks, tears, and loose seams.
Small problems are usually easier to address before moisture works its way into underlying materials.
Storage Compartments
Empty storage compartments and remove unnecessary gear.
Look beneath tackle trays and around compartment corners for trapped water, mold, or mildew.
Clean out drainage channels and inspect compartment seals.
Moisture-sensitive items, including clothing, electronics, and certain tackle supplies, are better stored in a suitable indoor location during long periods of inactivity.
If safe and practical, allow compartments to remain ventilated during drying and storage.
Inspect Hardware and Accessories
Check seat pedestals, compartment hinges, latches, cleats, handrails, and accessory mounts.
Inspect shallow-water anchor mounting hardware if equipped, along with the visible components of their operating systems.
Correct loose hardware and address damaged or corroded components.
Hull and Interior Maintenance Checklist
☐ Thoroughly wash the hull and deck.
☐ Inspect for cracks, gouges, or impact damage.
☐ Clean and dry carpeting and flooring.
☐ Inspect upholstery and seat hardware.
☐ Empty and clean storage compartments.
☐ Check drainage channels and seals.
☐ Inspect hinges, latches, and mounting hardware.
☐ Address corrosion or damaged surfaces.
☐ Allow the boat to dry before covering.
What to look for: Persistent moisture, mildew, structural cracking, loose components, deteriorating seals, or damaged hull surfaces.
9. Boat Trailer Maintenance: Don't Forget What Gets You to the Lake
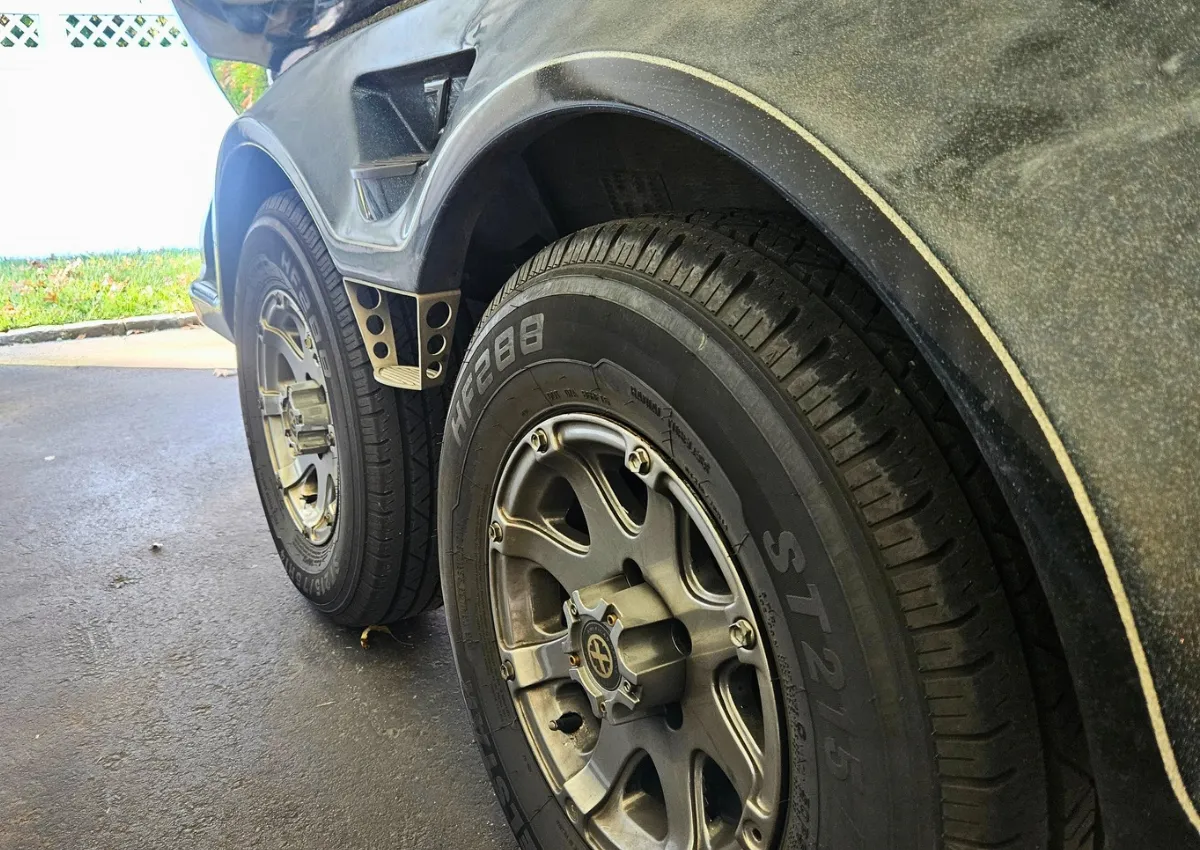
Your bass boat trailer may spend more time sitting in the driveway than traveling down the road, but it's still subjected to considerable stress.
Repeated immersion at the boat ramp, highway travel, road salt, rain, and seasonal temperature changes all contribute to trailer wear.
A neglected trailer can leave you stranded long before you get to the lake.
Inspect Tires and Wheels
Begin with the tires.
Look for uneven tread wear, cracks in the sidewalls, bulges, cuts, and other damage.
Trailer tires can deteriorate with age even when they have plenty of tread remaining.
Check the manufacturing date code when assessing tire age, and follow the tire manufacturer's replacement guidance.
Inflate tires to the pressure required for the trailer's tires and loading conditions, using the tire and trailer specifications.
Inspect the spare tire as well. It won't help much if it's flat or badly deteriorated when needed.
Check the wheels for visible damage and inspect lug nuts according to the trailer manufacturer's requirements.
Wheel Bearings and Hubs
Trailer bearings operate in a demanding environment.
Hot hubs may be submerged in cooler lake water, while seals and bearings are exposed to moisture, road debris, and repeated loading.
Inspect hubs for grease leakage, damaged seals, or signs of contamination.
Depending on the hub design, maintenance may involve grease, oil-bath lubrication, or other manufacturer-specific procedures.
With the trailer safely supported using the correct equipment and procedures, a technician or experienced owner can inspect for unusual wheel play or roughness.
If a hub makes grinding noises, leaks lubricant, develops excessive heat, or shows other signs of bearing failure, address it before towing.
Trailer Brakes
If your trailer has brakes, inspect the system periodically.
Check brake lines, fittings, calipers, rotors, and other accessible components for corrosion, leaks, or damage.
Surge-brake systems may have fluid reservoirs and mechanical components that require service.
Electric-over-hydraulic systems have additional electrical and hydraulic components.
Follow the trailer manufacturer's maintenance requirements, and do not tow with defective brakes.
Lights and Wiring
Connect the trailer to the tow vehicle and test the running lights, brake lights, turn signals, and any additional required lighting.
Inspect the electrical connector for corrosion or damage.
Check accessible wiring for abrasion, loose connections, and deteriorating insulation.
Trailer light problems are often related to damaged wiring, poor grounds, or water intrusion.
Winch, Coupler, Safety Chains and Bunks
Inspect the winch strap or cable for fraying, corrosion, or other damage.
Check the bow stop, safety chain, and winch attachment hardware.
Make sure the coupler operates correctly and fits the tow vehicle's hitch ball.
Inspect the safety chains and breakaway system if equipped.
Check the trailer frame, suspension, axle components, bunks, rollers, and supporting brackets for corrosion, damage, and loose fasteners.
Worn or damaged bunks can affect how the boat is supported and may contribute to hull damage.
Preparing the Trailer for Winter
Park the trailer on stable, suitable ground.
Avoid locations where wheels or metal components will remain in standing water.
Follow manufacturer recommendations for prolonged storage, tire care, and trailer support.
If you use a trailer jack or additional supports, ensure they are rated and positioned correctly. Never work beneath an improperly supported trailer.
Boat Trailer Maintenance Checklist
☐ Check tire pressure and tire condition.
☐ Inspect tire age and the spare tire.
☐ Inspect wheels and lug nuts.
☐ Check wheel bearings, hubs, and seals.
☐ Inspect the braking system.
☐ Test all trailer lights.
☐ Inspect wiring and electrical connectors.
☐ Check the winch strap, bow stop, and safety chain.
☐ Inspect coupler and breakaway equipment.
☐ Check frame, axles, suspension, bunks, and rollers.
☐ Inspect transom tie-down straps.
☐ Prepare the trailer for prolonged storage if needed.
What to look for: Tire cracking, uneven wear, leaking hub seals, excessive hub heat, grinding noises, brake problems, rusted structural components, or damaged towing hardware.
10. Winterizing Your Bass Boat for Extended Storage
Winter preparation is an important part of boat maintenance, especially for anglers living where lakes freeze or fishing opportunities become limited.
However, winterizing a bass boat involves more than adding fuel stabilizer and covering it.
Your outboard, plumbing, batteries, electrical equipment, and storage areas all require attention.
Decide Whether the Boat Will Be Stored or Used
Before beginning winterization, consider how the boat will be used over the next several months.
If the boat will remain unused until spring, complete the full storage procedures recommended by its manufacturers.
If you intend to fish during the winter, certain maintenance tasks will need to be performed after every cold-weather outing instead.
Do not treat a boat that will be used regularly as if it has been permanently placed into storage.
Prepare the Outboard
Follow the outboard manufacturer's storage instructions for your particular engine.
Depending on the model, those procedures may include fuel treatment, engine oil service, lower-unit lubricant replacement, internal corrosion protection, lubrication, and cooling-system drainage.
Some outboards require special storage procedures involving engine oiling or fogging. These procedures differ between conventional two-stroke, direct-injected two-stroke, and four-stroke engines.
Never assume that a procedure demonstrated on another engine is appropriate for yours.
For many outboards, storing the engine in its normal vertical operating position helps residual cooling water drain.
However, always follow the storage-position requirements for your exact engine and installation.
Drain the Boat's Water Systems
Water trapped inside pumps, hoses, livewell valves, and bilge plumbing can freeze and cause damage.
Drain all systems as directed by the boat manufacturer.
Check areas where water can become trapped, including low sections of hoses and pump housings.
If winterizing fluid is required, use only an approved product and follow the applicable procedure.
Automotive antifreeze is not an appropriate substitute for marine winterizing products in boat plumbing systems.
Prepare Batteries for Storage
Charge or discharge each battery to the storage state recommended by its manufacturer.
Inspect connections, disconnect electrical loads as directed, and arrange suitable storage or maintenance charging.
Pay particular attention to lithium battery charging restrictions during freezing weather.
Clean, Dry and Organize the Boat
Remove unnecessary fishing gear, food, and moisture-sensitive items.
Clean compartments and allow carpeting, upholstery, and bilge spaces to dry thoroughly.
Remove anything that could attract rodents.
Check compartments and hidden areas for conditions that could trap moisture.
Choose the Right Storage and Covering Arrangement
Indoor storage provides protection from weather exposure, but it isn't always available.
If the boat must remain outside, use a properly fitted cover or other professionally installed storage protection suitable for the boat.
The cover should shed water and snow rather than allowing it to accumulate in low areas.
Provide appropriate ventilation to reduce condensation.
Avoid sealing the boat so tightly that moisture remains trapped inside.
Periodically inspect the cover, especially after severe weather.
Also check for animal activity and damage to exposed components.
Winter Storage Checklist
☐ Complete all required outboard storage service.
☐ Follow the correct fuel treatment procedure.
☐ Inspect or change lower-unit lubricant as required.
☐ Position the outboard for proper drainage and storage.
☐ Drain and protect livewell and bilge plumbing.
☐ Prepare all batteries according to their chemistry.
☐ Remove unnecessary or moisture-sensitive equipment.
☐ Clean and completely dry the boat.
☐ Inspect compartments for trapped moisture.
☐ Install a properly supported and ventilated cover.
☐ Check the trailer and storage location.
☐ Schedule periodic inspections during storage.
11. Special Considerations for Anglers Who Fish All Winter
Not every bass angler puts the boat away when temperatures drop.
In some regions, winter fishing can be excellent, particularly when conditions allow access to open water.
But cold-weather boating introduces additional maintenance responsibilities.
Drain Water After Every Trip
After leaving the ramp, follow the engine manufacturer's procedure for draining residual cooling water.
Check the boat's bilge and livewell systems for water that could freeze after the boat is parked.
Do not assume that operating pumps briefly will remove all water from their housings and plumbing.
Use the approved drainage procedure for your boat.
Monitor Battery Performance
Cold temperatures can reduce the available performance of many batteries.
Make sure your starting battery is in good condition before heading out.
If you use lithium batteries, verify that charging conditions are within the battery manufacturer's permitted range.
Inspect the Trailer After Launching
Water remaining around trailer components can freeze in cold weather.
Inspect the trailer after launching and retrieving the boat, paying particular attention to brakes, winches, steps, and other mechanical components.
Remove ice or snow that could interfere with safe operation.
Give Safety Equipment Additional Attention
Cold water is dangerous even when the air temperature feels comfortable.
Wear a properly fitted life jacket, carry the required safety equipment, and use an engine cut-off switch as required.
Check weather and water conditions before launching.
Let someone know where you plan to fish and when you expect to return.
A mechanical problem is always inconvenient, but its consequences can be much more serious during cold-weather boating.
Winter Fishing Maintenance Checklist
☐ Check weather, water, and launch conditions.
☐ Verify batteries and critical electrical systems.
☐ Inspect safety equipment.
☐ Drain the outboard as directed after use.
☐ Drain or protect livewell and bilge plumbing.
☐ Remove trapped water from compartments.
☐ Inspect the trailer for ice and freezing-related problems.
☐ Check the boat again before temperatures fall below freezing.
12. Common Bass Boat Maintenance Mistakes to Avoid
Even experienced anglers occasionally overlook small maintenance tasks.
The following mistakes are especially important because they can lead to preventable damage or lost fishing time.
Waiting Until Spring to Inspect Lower-Unit Lubricant
Water-contaminated gear lubricant can cause damage during storage, particularly when temperatures drop below freezing.
Inspecting and servicing it before winter provides an opportunity to identify leaks and other problems early.
Forgetting About Fishing Line Behind Propellers
Fishing line isn't always visible from outside the propeller.
Removing and inspecting the propeller periodically can reveal line that might otherwise damage a shaft seal.
Assuming a Running Pump Is Working Properly
A bilge or livewell pump may make noise even when its intake or discharge is blocked.
Always verify that water actually moves through the system during an appropriate functional test.
Using the Wrong Battery Charging Procedure
Different battery chemistries have different charging and storage requirements.
A charging routine that works for AGM batteries may not be appropriate for lithium batteries.
Ignoring Trailer Tires and Bearings
Trailer tires may deteriorate before their tread is worn down.
Likewise, failing bearings often develop warning signs before they completely fail.
Regular inspection is much less expensive than dealing with a roadside breakdown.
Storing a Wet Boat Under a Tight Cover
Trapped moisture can contribute to mildew, corrosion, and deterioration of interior materials.
Thorough cleaning, drying, and ventilation are important parts of storage preparation.
Overlooking Loose Electrical Connections
Vibration from rough-water operation can loosen hardware and connections over time.
Inspect battery terminals, electrical connectors, and accessible wiring periodically.
Following Generic Winterization Instructions
Not every outboard or boat uses the same winterization procedure.
Incorrect fogging, flushing, fuel treatment, or charging practices may damage expensive equipment.
When in doubt, consult the manufacturer or an authorized service provider.
Putting Off Small Problems
A pump that occasionally stops working, a trolling motor that makes an unusual noise, or a trailer hub that runs hotter than normal is telling you something.
Investigating these problems early can prevent more serious failures later.
13. Your Bass Boat Maintenance Schedule
Boat maintenance is easier when you divide it into manageable tasks instead of trying to complete everything at once.
The following schedule is a general guide. Actual service intervals depend on your boat, engine, equipment, operating conditions, and manufacturer's recommendations.
After Every Fishing Trip
☐ Check the outboard and trolling motor props for damage or debris.
☐ Remove weeds, fishing line, and other visible obstructions.
☐ Drain standing water from the boat as appropriate.
☐ Inspect the bilge for unusual water accumulation.
☐ Recharge batteries according to manufacturer instructions.
☐ Check the trailer for obvious tire, hub, or lighting problems.
☐ Remove wet gear and allow compartments to dry.
☐ Record any mechanical or electrical issues noticed during the trip.
Monthly or Periodically During the Season
☐ Inspect accessible battery terminals and electrical connections.
☐ Check trolling motor mounting hardware.
☐ Test bilge and livewell systems.
☐ Inspect trailer tires, bearings, and brakes.
☐ Review engine fluid levels and service requirements.
☐ Check for leaks or damaged wiring.
☐ Inspect safety equipment and required onboard supplies.
At Scheduled Service Intervals
☐ Perform outboard oil, filter, and gear lubricant service as applicable.
☐ Review water pump and impeller maintenance.
☐ Inspect or replace fuel-system service items.
☐ Lubricate designated components.
☐ Check steering and trim systems.
☐ Perform other manufacturer-specified engine and boat service.
Before Extended Winter Storage
☐ Complete required engine winterization.
☐ Drain and protect plumbing systems.
☐ Prepare batteries for storage.
☐ Thoroughly clean and dry the boat.
☐ Inspect and protect electronics and wiring.
☐ Service and prepare the trailer.
☐ Install appropriate weather protection.
☐ Record completed maintenance and any remaining repairs.
Before the First Spring Trip
☐ Verify battery condition and charging.
☐ Inspect engine fluid levels and service status.
☐ Check all electrical and plumbing systems.
☐ Test trolling motor and electronics.
☐ Inspect trailer tires, bearings, brakes, and lights.
☐ Check steering and engine controls.
☐ Confirm safety equipment.
☐ Complete a controlled operational test before a long run.
Maintenance Tip: Keep a simple log of engine hours, dates, completed service, parts replaced, and problems discovered. Even a basic notebook or phone spreadsheet can make future maintenance easier.
14. Getting Your Bass Boat Ready for Spring
After several months of storage, it's tempting to hook up the trailer and head straight to the lake on the first warm morning.
But spending a little additional time preparing the boat can prevent problems at the ramp or out on the water.
Inspect the Boat Before Reconnecting Power
Remove the cover and examine the boat for signs of moisture, mold, rodents, or storage-related damage.
Check accessible wiring, hoses, and other equipment for evidence of animals chewing or nesting.
Inspect the bilge and storage compartments for water.
Make sure all required drain plugs, fittings, and other components are correctly installed before launching.
Reconnect and Test Batteries
Prepare batteries for use according to the manufacturer's instructions.
Inspect and secure all electrical connections.
Verify charging system operation and check that the batteries can support their intended loads.
Test All Major Systems
Before heading to the ramp, verify the operation of your electronics, navigation lights, trolling motor, steering, and onboard accessories.
Test bilge and livewell functions using the correct procedures and water supply where required.
Confirm that automatic bilge pump operation is functioning if your boat is equipped with that feature.
Check the Outboard
Review engine maintenance records and make sure all required service has been completed.
Inspect for fuel, oil, or hydraulic leaks.
Check engine fluid levels and inspect accessible connections.
If conducting a pre-launch engine test, follow the manufacturer's requirements for cooling-water supply and safe operation.
Never run an outboard without the cooling water required for that procedure.
Inspect the Trailer
Check tire condition and pressure, including the spare.
Verify trailer lights, coupler, safety chains, winch, tie-downs, brakes, and bearings.
Make sure the boat is secured properly for towing.
Make the First Trip a Systems Check
Your first outing doesn't need to be a full-day fishing trip.
If possible, launch somewhere familiar and begin with a short, controlled systems test.
Check engine operation, steering, trim, electronics, trolling motor, livewell functions, and bilge operation.
Pay attention to unusual vibration, noises, warning indicators, or changes in performance.
A short shakedown trip provides an opportunity to discover problems close to the ramp rather than miles away from help.
Spring Preparation Checklist
☐ Remove the cover and inspect the boat.
☐ Check for rodents, moisture, and storage damage.
☐ Install and test batteries.
☐ Inspect fuel and fluid systems.
☐ Verify engine service and operating condition.
☐ Test electronics and trolling motor.
☐ Test bilge, livewell, and aeration systems.
☐ Inspect trailer components.
☐ Confirm drain plugs and safety equipment.
☐ Perform a controlled initial on-water test.
A Little Maintenance Goes a Long Way
A bass boat is a major investment, but more importantly, it's what gets you out on the water doing something you enjoy.
Keeping it in good condition doesn't have to be complicated. Most maintenance starts with paying attention, performing regular inspections, and fixing small problems before they become expensive ones.
Some jobs require professional service, but there are plenty of things every bass boat owner can do to keep equipment clean, protected, and working properly.
The important thing is to develop a routine.
Don't wait until something stops working to give it your attention. Take care of the motor, batteries, trolling motor, electronics, plumbing, and trailer throughout the season.
And when winter arrives, use the off-season to address anything you didn't get to while the fishing was good.
Because when that first opportunity to get back on the lake arrives, the last thing you want to be doing is troubleshooting a problem that could have been prevented months earlier.
Take care of your boat now, so it's ready when the fish are biting.
Frequently Asked Questions
Should I change my outboard's lower-unit oil before winter?
Inspecting and changing the lower-unit lubricant according to the manufacturer's service schedule before extended winter storage is a good practice. It can reveal water contamination that might otherwise remain in the gearcase during freezing weather.
Should I leave my outboard motor tilted up during winter storage?
Many outboard manufacturers recommend storing the motor in its normal vertical position so residual cooling water can drain. Follow the instructions for your particular engine and storage setup.
Can I leave my boat batteries connected to a charger all winter?
That depends on the battery chemistry, charger type, and manufacturer recommendations. Some lead-acid batteries can be maintained with compatible automatic chargers, while lithium batteries may have different long-term storage requirements.
Do lithium trolling motor batteries need to be removed for winter?
Not necessarily. Whether removal is appropriate depends on the battery's storage temperature limits, charging restrictions, installation, and manufacturer guidance.
How often should I inspect my trolling motor propeller?
Inspect it regularly, especially after fishing heavy vegetation or areas where fishing line and debris may become tangled. Some trolling motor manufacturers recommend inspecting behind the prop after every trip.
Do I need to winterize my boat if I fish all year?
You may not need to place the boat into extended storage, but cold-weather operation still requires protection against freezing water, proper battery care, and regular inspection. Follow the equipment manufacturer's cold-weather operating and drainage procedures.
Should I perform all boat maintenance myself?
No. Cleaning, visual inspections, and certain routine maintenance tasks may be suitable for boat owners with the proper knowledge and tools. Fuel-system repairs, structural damage, complex electrical problems, steering failures, and internal engine work should generally be evaluated by qualified professionals.
Maintenance and Safety Note: This article provides general preventative maintenance information for bass boat owners. Procedures, service intervals, lubricants, electrical requirements, and storage methods vary by manufacturer and model. Always consult the applicable owner's manuals and use a qualified marine technician when necessary.
Manufacturer Maintenance Resources & Owner's Manuals
Every bass boat is different, and maintenance requirements can vary considerably between manufacturers, models, and model years. For specific service intervals, lubricant requirements, winterization procedures, and equipment instructions, always refer to your manufacturer's official documentation.
The following resources can help you locate the appropriate maintenance information for your equipment.
Outboard Motor Resources
- Mercury Marine — Owner's Manuals
- Yamaha Outboards — Owner's Manuals
- Yamaha Outboards — Maintenance Matters
- Honda Marine — Owner's Manuals
Trolling Motor Resources
- Minn Kota — Trolling Motor Manuals & Support
- Garmin — Force Trolling Motor Owner's Manual
- Lowrance — Ghost Trolling Motor & Product Support
For other equipment, including marine electronics, batteries, onboard chargers, livewell pumps, and trailer components, visit the applicable manufacturer's support website and locate the documentation for your specific model.
Helpful Tip: Keep a digital copy of your boat, outboard, trolling motor, battery, and electronics manuals. Having them available on your phone makes it easier to check service procedures and troubleshooting information when needed.
BASSIN' USA provides general maintenance guidance. Manufacturer instructions and specifications should always take precedence when servicing your equipment.
Download the Complete BASSIN' USA Boat Maintenance Checklist
We've covered a lot of ground in this guide, and keeping track of every maintenance task can be challenging. That's why we've put together a comprehensive checklist to help you stay organized.
Our BASSIN' USA Boat Maintenance & Winter Preparation Checklist brings together the important inspection, service, and storage tasks covered throughout this article in one convenient, printable reference.
What's Included?
- Outboard motor inspection and maintenance
- Battery care, charging, and winter storage
- Trolling motor maintenance
- Electronics, wiring, and connections
- Livewell, bilge, and plumbing systems
- Hull, deck, and interior maintenance
- Boat trailer inspection and service
- Winter storage and cold-weather preparation
- Seasonal maintenance schedules and spring readiness
Use this free printable checklist when performing a complete boat inspection, or refer to the individual checklists within each section of this article when working on something specific.
Download the Master Maintenance Checklist (PDF)
Free 5-page printable PDF. No signup required.
Always refer to your equipment manufacturer's instructions for specific maintenance procedures and service intervals.